
How to Set Up the Simple Voice Chat Plugin on a Minecraft Server
Articles
← BackDo you want to talk to the players on your Minecraft server by voice, directly in the game and without Discord? That is exactly what Simple Voice Chat does – a proximity voice chat where you hear the players around you and their voice fades with distance, just like in real life. It also supports group calls and whispering. It consists of two parts: a plugin on the server and a mod on every player's side. In this guide we will go through the whole setup from scratch: allocating a port in the Game panel, installing the plugin, setting the port in its configuration and installing the mod for players.
How Simple Voice Chat works
Voice is not sent over the game connection but over a separate port (using the UDP protocol). The plugin on the server receives voice from players on this port and passes it on to everyone within earshot. Every player therefore needs the Simple Voice Chat mod in addition to the game itself, which handles the microphone and speakers. A player without the mod joins the server perfectly normally, they just cannot hear anyone and nobody can hear them.
Before you begin, make sure you have:
- A Minecraft server at Wespner with plugin support – that is Paper or one of its forks (for example Purpur). Plugins do not work on a plain Vanilla server.
- Access to the Game panel at game.wespner.eu.
- Players on Java Edition with a launcher that can load mods (Fabric, NeoForge, Forge or Quilt). Bedrock Edition and consoles do not support the voice chat.
If you run a network of servers behind a proxy (Velocity or BungeeCord), the plugin is also needed on the proxy. That setup is described in the official documentation. This guide covers a single standalone server.
1. Allocating a port for the voice chat
Every game server gets a main (primary) port from us, which players use to connect. For the voice chat you need another, separate port. In the Game panel, ports are called allocations.
- Log in to the Game panel at game.wespner.eu and open your server.
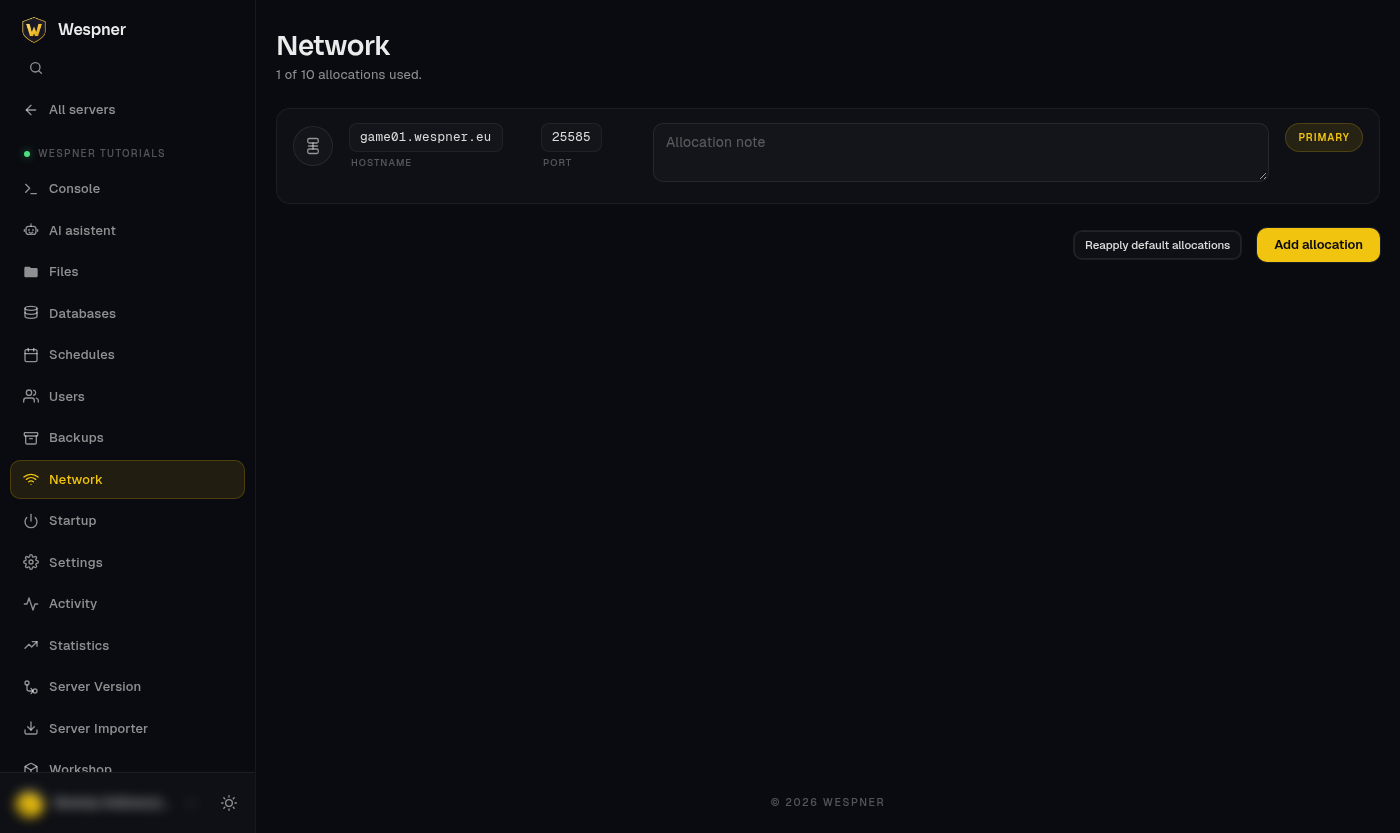
- Go to the “Network” tab. You will see the list of allocations. Our tutorial server has only one so far – the primary one (marked “Primary”) with port 25585, which players connect to.
- Click the yellow “Add allocation” button. The panel adds a new row with another port – in our case 25958. You do not choose the number yourself, the panel assigns it, and it will be different on your server.
- In the “Allocation note” field next to the new port, type something like “VoiceChat” so you know later what the port is for. The note is saved automatically as soon as you click outside the field.
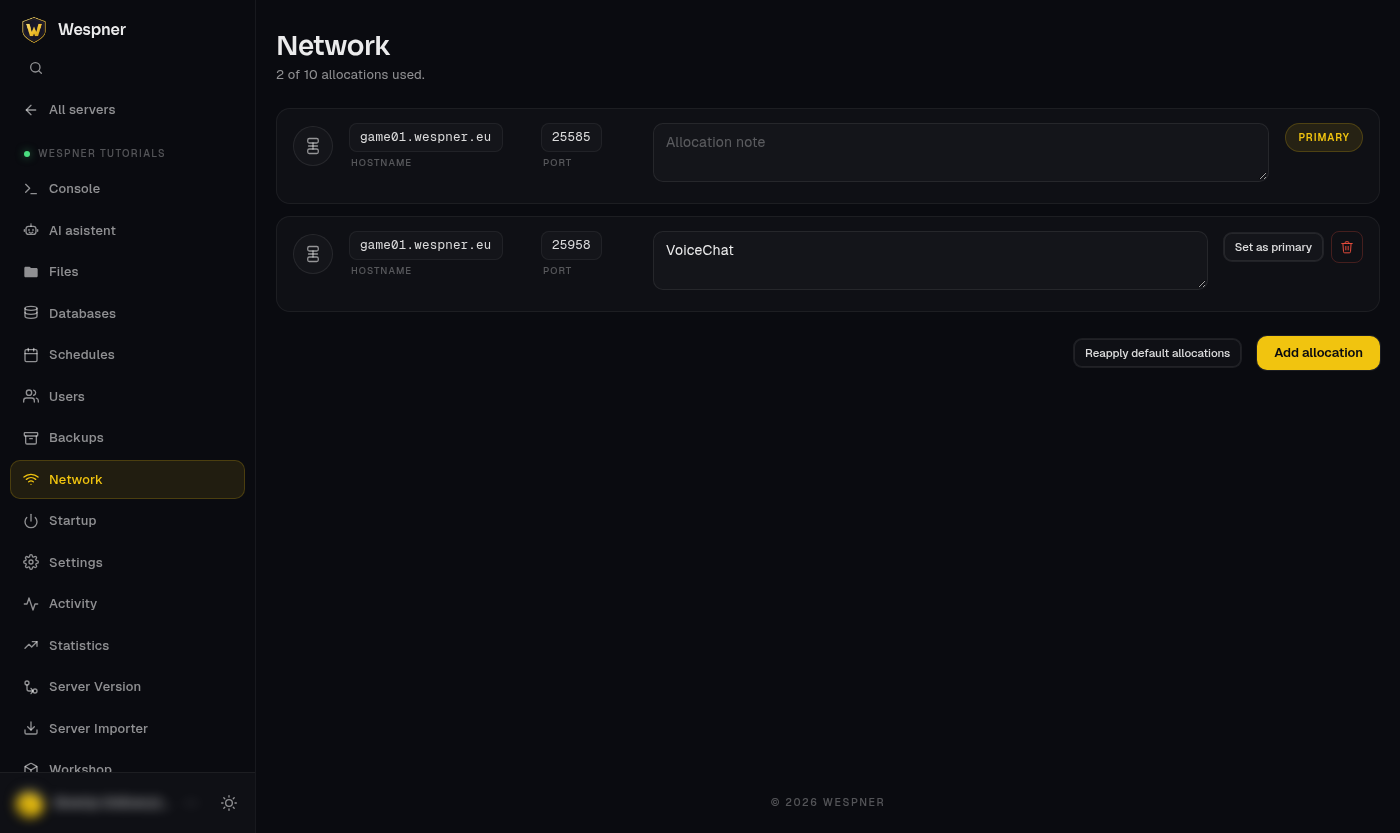
Above the list you can see how many allocations you have available (in our case “2 of 10 allocations used”). If the button for adding an allocation is missing, you have used up the port limit of your plan – contact our support and we will add a port for you. There is no firewall to configure: the allocated port is reachable from the internet automatically, including UDP, which the voice chat uses.
The plugin can also use the game port (value port=-1), but it warns against this in its own configuration – UDP on the game port is used by server queries and it could crash the server. Always use a separate port.
In the following steps we will work with these values (yours will differ): server address wespner.mcplay.cz, game port 25585 and voice chat port 25958.
2. Downloading and installing the plugin
Download the plugin from modrinth.com/plugin/simple-voice-chat:
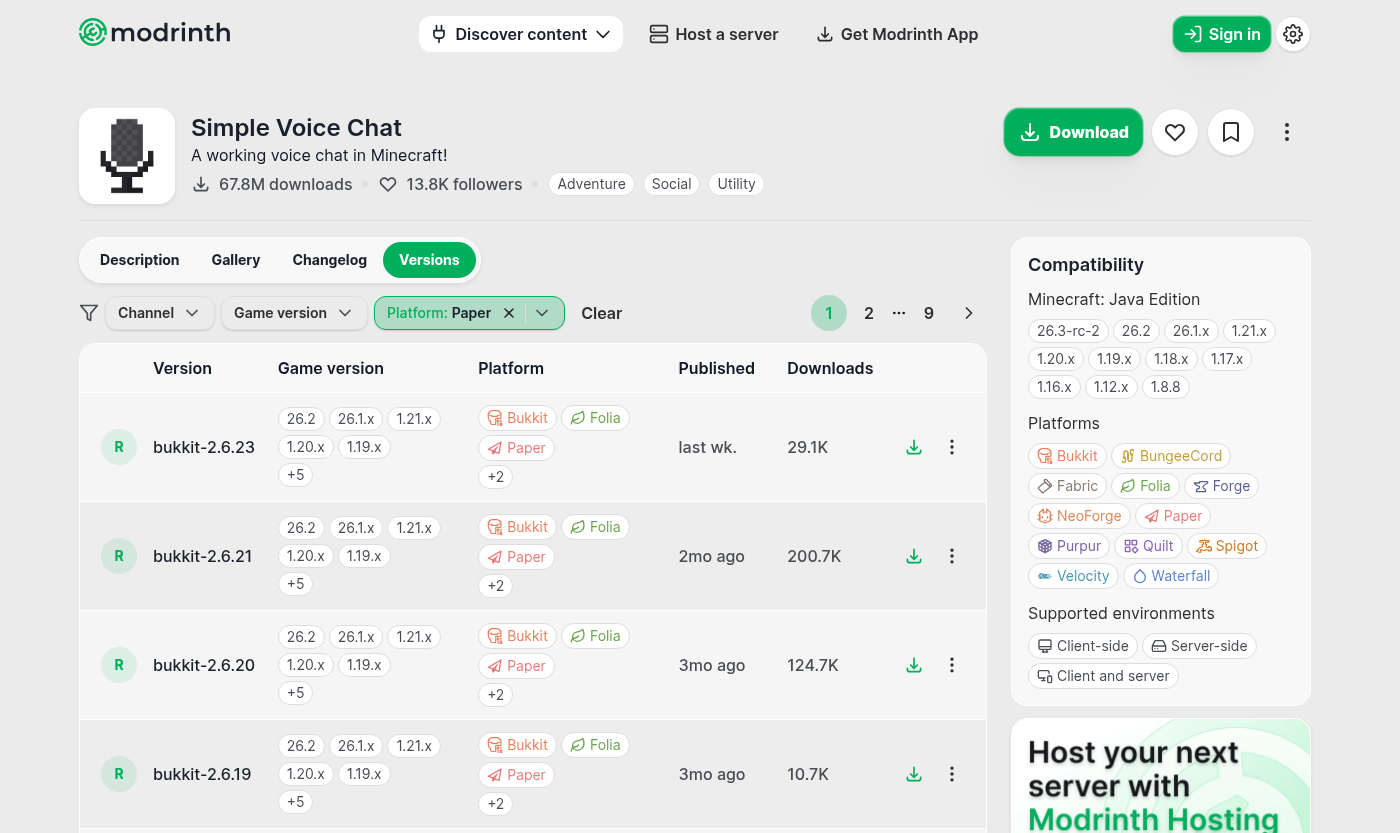
- Open the “Versions” tab and choose Paper in the “Platform” filter. Only the server versions of the plugin are shown – you recognise them by the name
bukkit-x.y.z. - In the “Game version” column, check that the version supports your Minecraft version and download the newest one. In our case it is bukkit-2.6.23 for Minecraft 26.2, the file
voicechat-bukkit-2.6.23.jar.
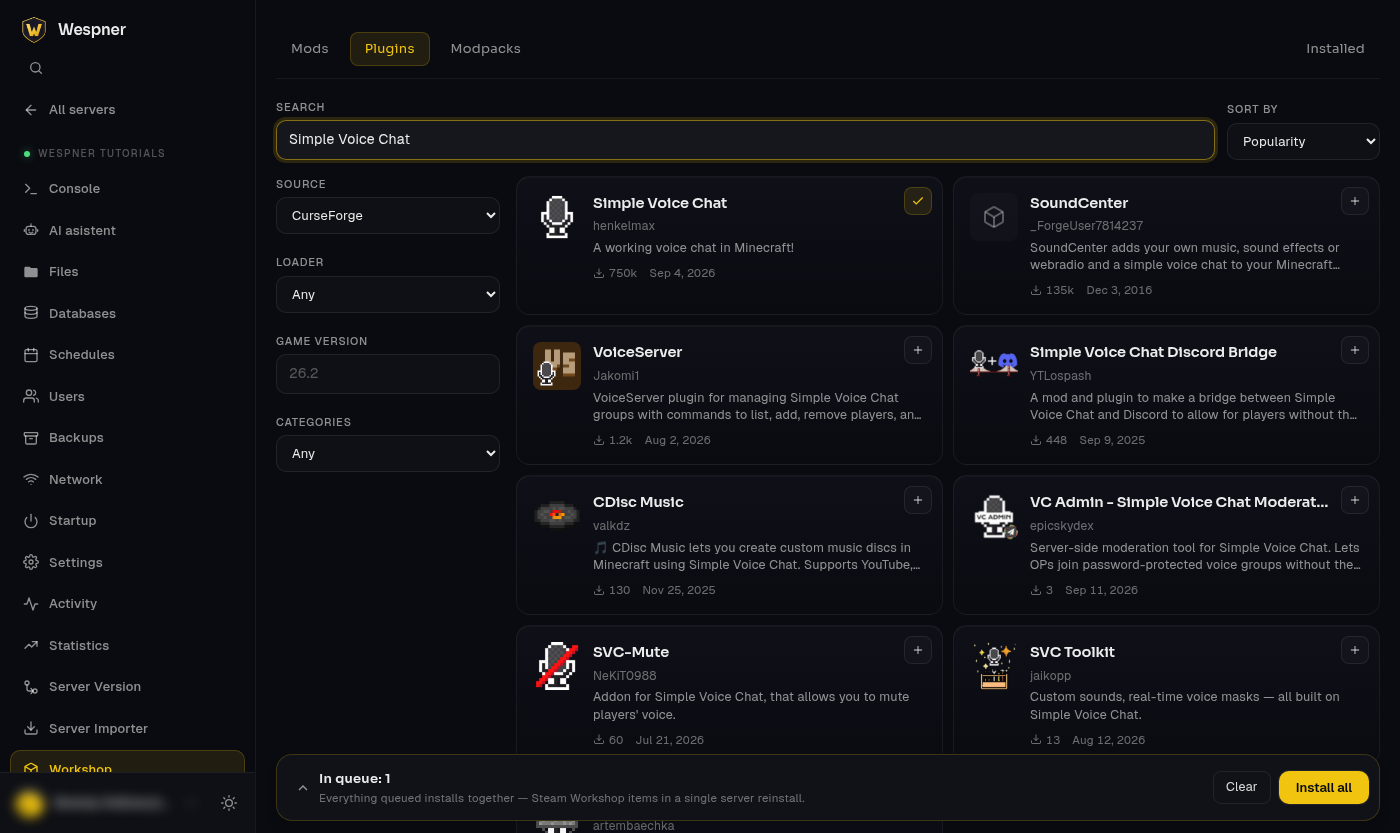
The most convenient way is our “Workshop” tab in the Game panel: switch to “Plugins”, search for “Simple Voice Chat”, click the “+” icon (Add to queue) next to the plugin and then click “Install all” in the bar at the bottom. The Workshop downloads the plugin into the plugins folder for you and keeps it updated automatically, so you do not have to download it from Modrinth by hand.
If you want to upload the file downloaded from Modrinth manually:
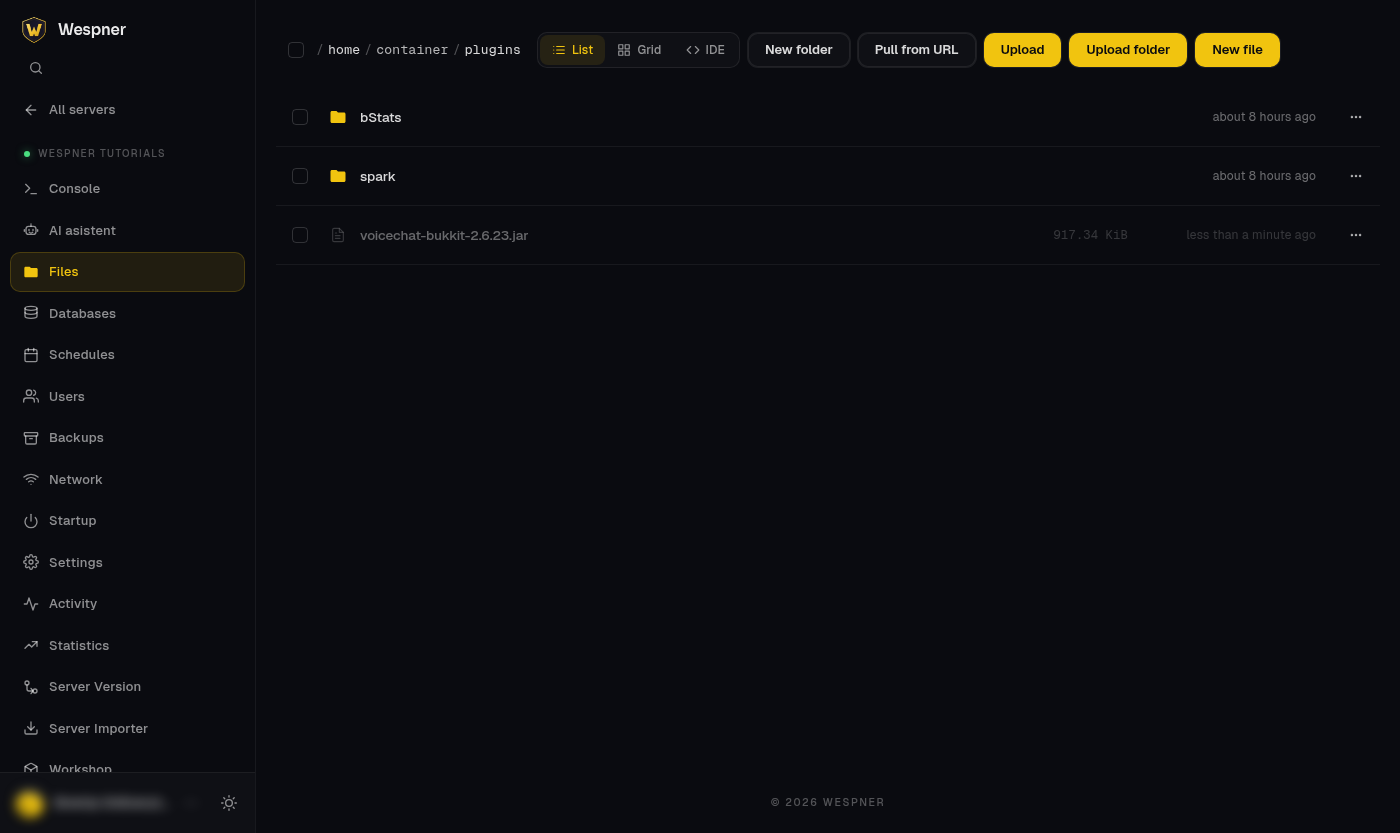
- In the Game panel, open the “Files” tab and enter the
pluginsfolder. - Click the yellow “Upload” button and select the downloaded file (or drag and drop it into the window). If you only have a download link, you can use the “Pull from URL” button, paste the link and the panel downloads the file for you.
- If you prefer SFTP, you will find the login details in the “Settings” tab. Upload the file into the same
pluginsfolder.
After the upload, the file appears in the listing:
Then go to the “Console” tab and restart the server with the “Restart” button in the top right. On startup, the plugin creates the plugins/voicechat folder with its configuration.
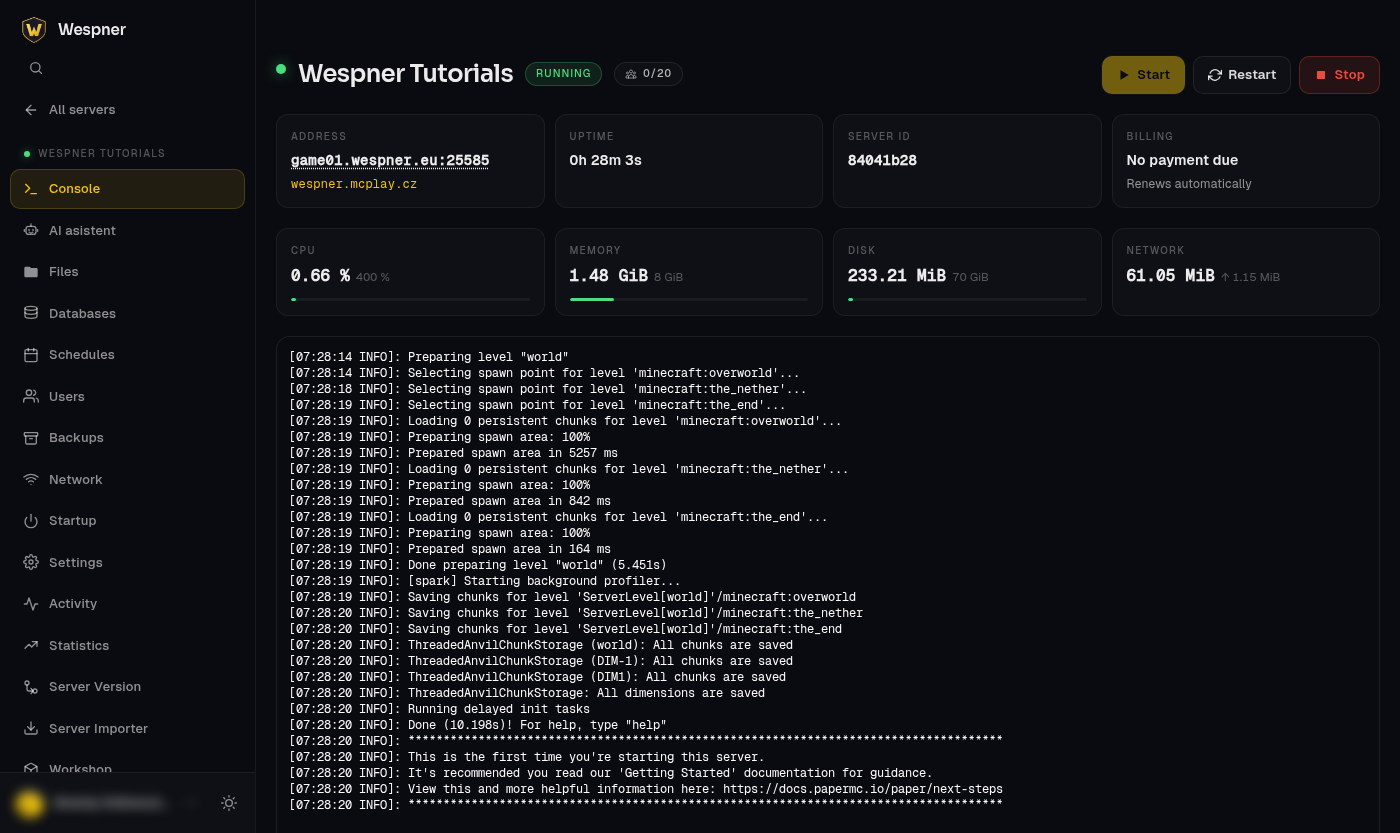
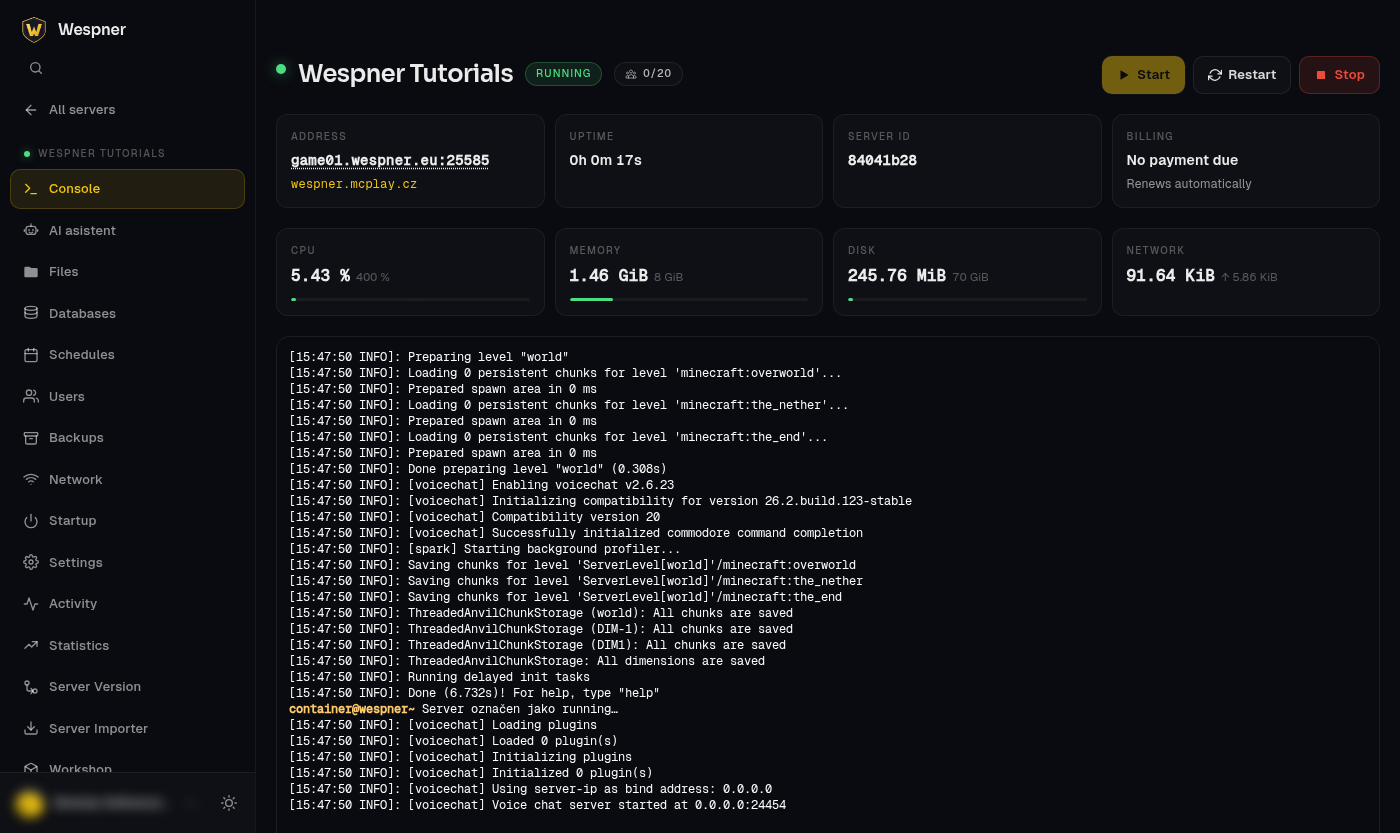
After the restart, watch the console output. On startup the plugin prints a few lines marked [voicechat]; the last one is the most important:
[voicechat] Enabling voicechat v2.6.23
[voicechat] Initializing compatibility for version 26.2.build.123-stable
[voicechat] Compatibility version 20
[voicechat] Using server-ip as bind address: 0.0.0.0
[voicechat] Voice chat server started at 0.0.0.0:24454
The voice server is running, but still on the default port 24454, which is not open on your server. In the next step we will change it to the port allocated in the Game panel.
3. Setting the port in the plugin configuration
In the “Files” tab, open the plugins/voicechat folder and click the voicechat-server.properties file – it opens directly in the panel's editor. It is a plain text file where every line starting with # is just a comment.
- Find the line
port=24454(line 9 in our case) and replace the number with the port from step 1. In our caseport=25958. This is the only entry you have to change. - Leave
bind_addressempty – the plugin uses the same address as the game server. - Leave
voice_hostempty. Players connect to the voice chat using the same address they used to join the game.
After the edit our file looks like this:
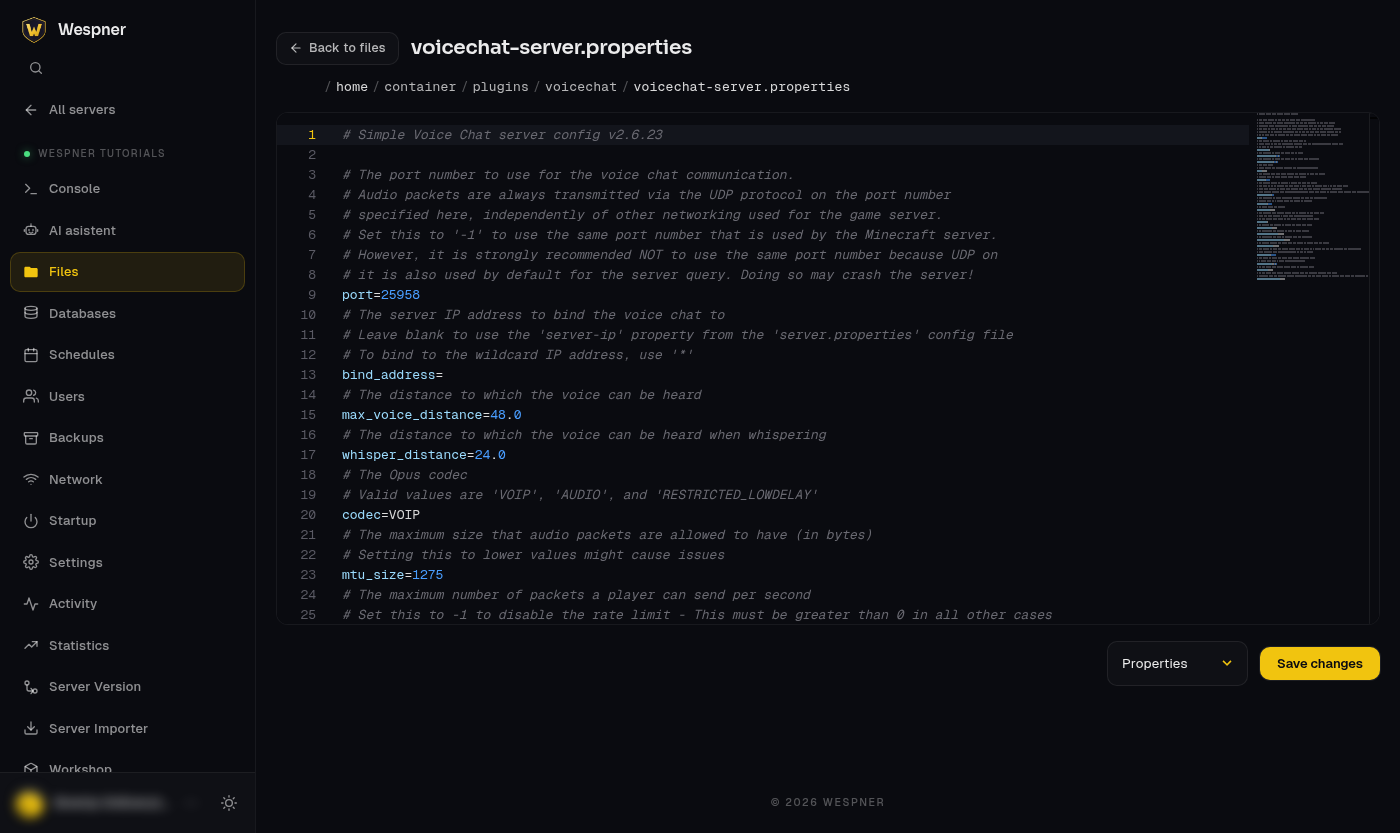
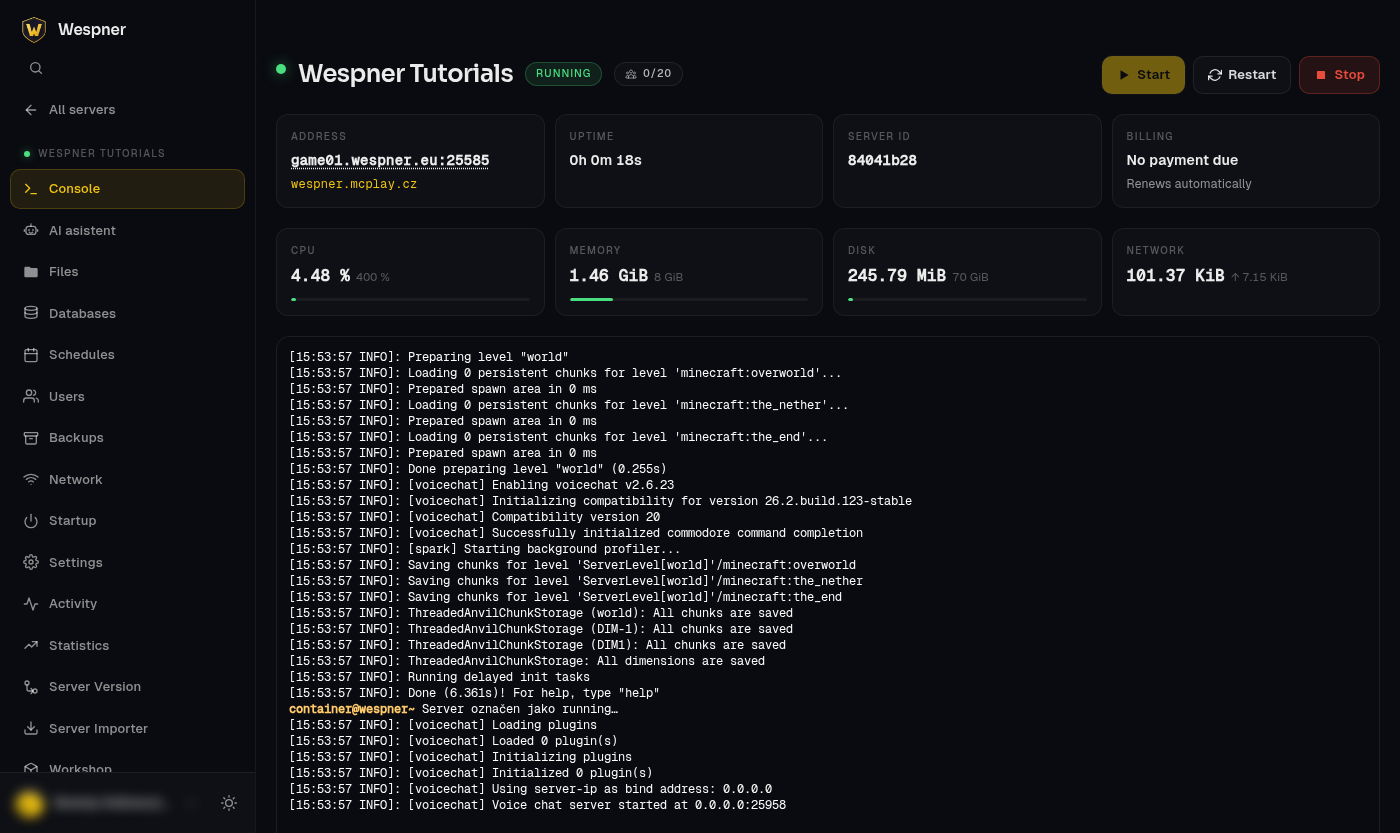
You save changes with the yellow “Save changes” button in the bottom right. Then restart the server again – the port change takes effect only after a restart. This time the console should show the line [voicechat] Voice chat server started at 0.0.0.0:25958, that is with your new port:
Other useful settings
In the same file you can also adjust how the voice chat behaves. After every change, save the file and restart the server.
max_voice_distance=48.0– the distance (in blocks) at which a player can be heard.whisper_distance=24.0– the range when whispering.enable_groups=true– whether players can create group calls in which they hear each other regardless of distance.allow_recording=true– whether players may record the voice chat.force_voice_chat=false– withtruethe server kicks every player who does not have the mod installed. Useful on servers where the voice chat is part of the gameplay.
4. The mod for players
The server side is done. For players to be able to talk, each of them has to install the Simple Voice Chat mod in their launcher. It is nothing complicated, but it is a good idea to send players these steps:
- You need a launcher with mod support – most commonly Fabric (with it, also install Fabric API, which most mods require), or NeoForge, Forge or Quilt. The Minecraft version must match the server, in our case 26.2.
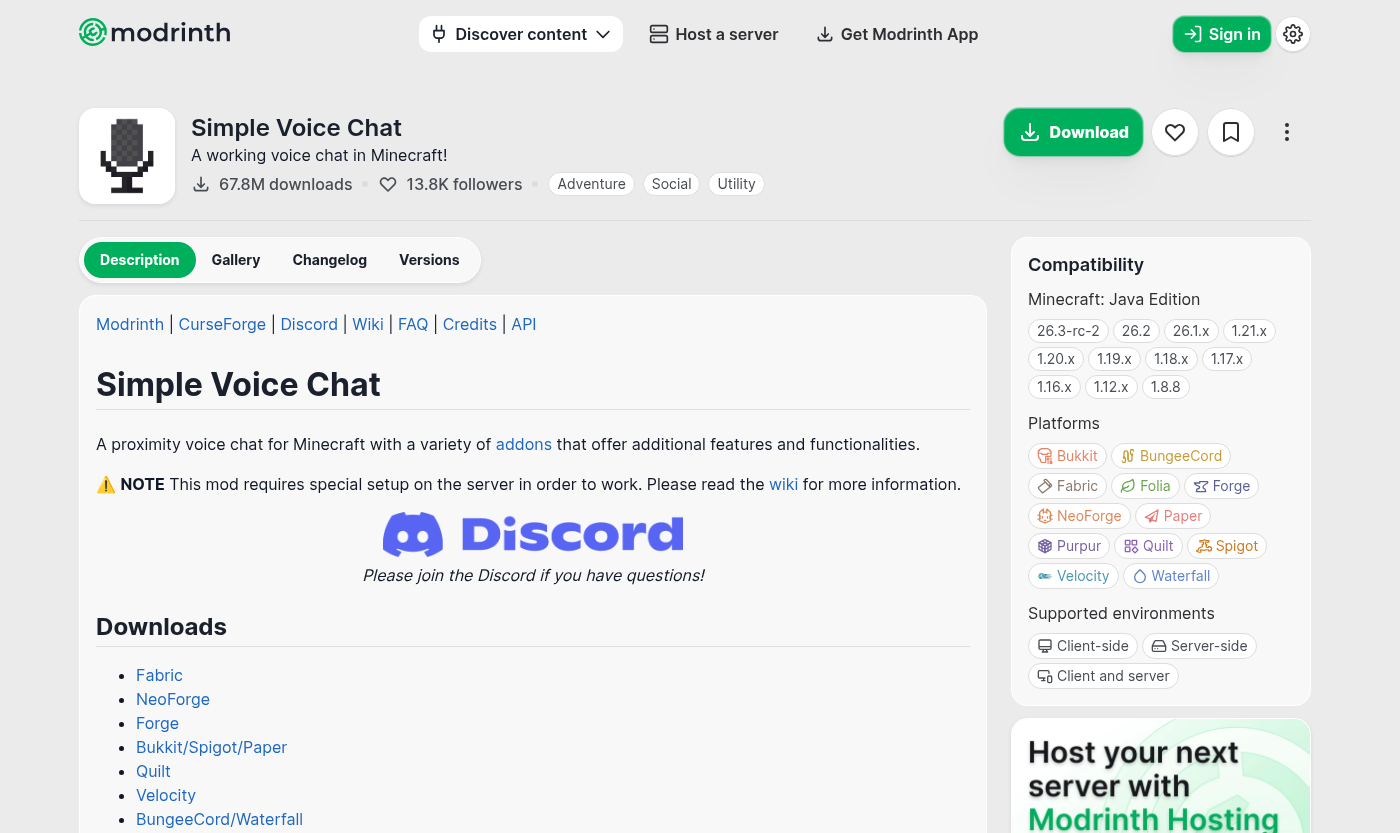
- On modrinth.com/plugin/simple-voice-chat, find the “Downloads” section in the description and choose the link for your launcher (Fabric, NeoForge, Forge or Quilt). Download the version for your Minecraft version.
- Put the downloaded
.jarfile into themodsfolder inside your Minecraft folder (on Windows%appdata%\.minecraft\mods) and start the game with the profile of that launcher.
After the first join, the mod shows a short guide: you pick a microphone and speakers, set a push-to-talk key or voice activation and adjust the sensitivity. Later you can open the voice chat menu at any time with the V key. Other default keys: M mutes the microphone, N disables the whole voice chat and H hides the icons. All of them can be changed in the game's controls settings.
You can tell everything works in the voice chat menu (V key) – the connection icon must not be crossed out, and when you talk, a microphone icon appears next to your name. The easiest test is to join with two players and stand next to each other.
Troubleshooting
- The mod says the voice chat is not connected (crossed-out icon). Most often the port does not match. Check that the port in
voicechat-server.propertiesis the same number as the allocation in the “Network” tab and that you restarted the server after editing. The console must contain the lineVoice chat server started at 0.0.0.0:<your port>. - The port matches, but players still cannot connect. Set
voice_hostin the configuration to the hostname and voice chat port in the formgame01.wespner.eu:25958(you find the hostname on the “Console” page in the “Address” card) and restart the server. Ordinary online port checkers will not help here – they cannot test UDP. - One particular player cannot connect, the others can. Their connection blocks UDP – typically mobile data, a hotspot or a VPN. Have them try a different network.
- A player hears nobody and nobody hears them. Either they do not have the mod installed, or they use a different Minecraft or mod version than the server. The mod and plugin versions should be the same, in our case 2.6.23.
- A player is kicked with a message about the missing mod. You have
force_voice_chat=trueenabled. Either the player installs the mod, or set the value back tofalse. - Nothing works after a configuration change. Do not use the
/reloadcommand. Restart the server after every configuration change.
If you are still stuck, open a ticket – include the server name, the port you used and the console output.